


Okay now for the tutorial: Let's get started once you master this flower you will be able to alter it however you like...
Here is what you need:

Fabric ( I used Muslin)
Needle and thread
Scissors
Pencil
Lace, Ribbons or pearls
Pretty button or vintage jewel
Staz on ink
Stamps
Circle punch
Tim Holtz tea dye distressing ink or you can use tea or coffe
Cardstock (to make your template)
Hot glue gun
Container

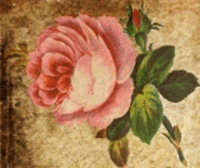
Make your template using your chipboard. One petal should be about 2 inches and the other about 1.5 inches in lengh. I simply drew two U shape petals (they don't need to be perfect). Trace and cut petals. I used 9 large and 4 small for my flower.

Using your Staz on ink and your stamps go ahead and stamp the hole petal, it's okay to overlap. Make sure to stamp the edges as well. Then in a container combine Tim Holtz distressing ink with water and bathe your petals in it for a few minutes. Do not rinse. Let dry.

This is how they should look like, you can see how I stamped my petals.

Now, using your needle and thread, make a pleat in the center and stich it in place.

After you are done stiching the pleat place your petal between your thumb and your index finger, now pull with your nail. (I hope this makes sence) You should see that your petal is beggining to curl. Do this to all your petals.

Punch a 1" circle out of paper or if you are going to wear your flower on a shirt you can also cut a circle out of felt. Apply glue to the middle then start placing your petals.

Now cut 4 pieces of lace about 3 inches long. I used Websters Pages Lace, I love Websters!

Again using your thread and needle sew a running stich on one side of the piece of lace. Here's how they should look.

Adhere two pieces of lace and more petals.

Continue layering petals and lace until all your large petals are gone.

Now that you are done with your large petals, adhere your small petals the same way.

Make a small bow using some more lace and adhere on the center of your flower.

Using a glue gun adhere your button or vintage piece of jewelry.

Tear a piece of muslin about 3/4 of an inch by 18, bathe in tea stain ink for a few minutes and let dry. Cut 16 inches or so of different laces and ribbons, again I used Websters laces and velvet ribon.

Apply your ribbon and lace pieces to the back of your beautiful flower and that's it enjoy! You can now add it to a shirt if you glue a pin on the back, or you can use it to decorate just about anything!
I hope I made this tutorial easy to follow, as always if you need any help let me know and I will help you as much as I can. You can find my email addres on the top right corner.


6 comments:
Thank you so much for this tutorial.
My project for this winter is to use up stuff I have around and make more room for our new baby and I do have a pile of fabric and trims that I plan to transform into flowers.
que bello tutorial, me encanta!!
felicitaciones!!
gracias Leslie
nos vemos!!
c@
que bello tutorial, me encanta!!
felicitaciones!!
gracias Leslie
nos vemos!!
c@
Beautiful flower, thanks for the tutorial :)
Muy bonita y diferente tu flor. Gracias por compartir tu creacion dejandonos el tuto.
Me encantan tus creaciones.
gracias por el tuto hermosa y la puntilla super cute..
Post a Comment